What is GarrantyDecrypt ransomware? And how does it implement its attack?
GarrantyDecrypt ransomware is a crypto-malware designed to lock important data in an infected machine. This dangerous cyber threat is kind of different from other threats of its kind since it terminates other malware that might be already running in the infected system right before it begins encrypting files.
Once it infects a computer, it drops its malicious payload in the system and connects it to a Command and Control server where it downloads several malicious components and places them to system folders. It may also make entries in the Windows Registry and modifies existing ones so that it can automatically run on each time users starts their computers. And as pointed out earlier, it terminates any other malware running in the system. After that, it scans the entire drive in the system in search for files with the following extensions.
.3g2, .3gp, .7z, .accdb, .aes, .ARC, .asc, .asf, .asm, .asx, .avi, .backup, .bak, .bat, .brd, .bundle, .c, .cgm, .cmd, .cpp, .crt, .cs, .csproj, .csr, .csv, .db, .dbf, .dch, .der, .dip, .djvu, .doc, .docb, .docm, .docx, .dot, .dotx, .dwg, .edb, .eml, .flv, .frm, .gif, .gpg, .gz, .htm,.html, .hwp, .Iay6, .ibd, .iso, .jar, .jpeg, .jpg, .js, .jse, .key, .lay, .lbd, .log, .m2ts, .max, .mdf, .mdp, .mid, .midi, .mkv, .mml, .mov, .mp3, .mp4, .mpeg, .mpg, .msg, .myd, .myi, .nef, .ocx, .odg, .odp, .odp, .ods, .odt, .onetoc2, .ost, .otg, .otp, .ott, .PAQ, .pas, .pdf, .pern, .pfx, .php, .png, .pot, .potm, .potx, .ppam, .pps, .ppsm, .ppsx, .ppt, .pptm, .pptx, .pst, .pub, .py, .pyc, .pyd, .pyo, .rar, .raw, .rm, .rpa, .sb2, .sch, .sh, .sin, .sldm, .sldx, .slk, .snt, .sql, .sql, .sqlite3, .sqlitedb, .stc, .std, .sti, .stw, .suo, .svg, .swf, .sxc, .sxd, .sxi, .sxm, .sxw, .tar, .tar, .tbk, .tiff, .txt, .uop, .uot, .vb, .vbe, .vbproj, .vbs, .vcd, .vdi, .vdmk, .vmx, .vob, .vsd, .vsdx, .wks, .wma, .wncry, .wrav, .xdata, .xlc, .xlm, .xls, .xlsb, .xlsm, .xlsx, .xlt, .xltm, .xltx, .xlw, .zip
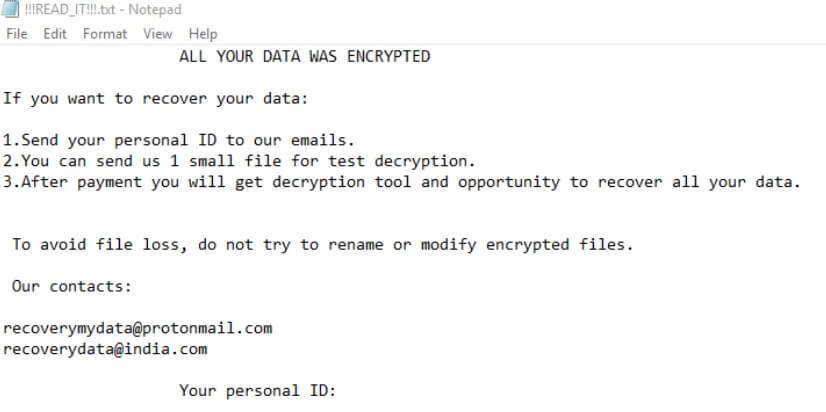
Based on the sample files gathered in the active campaign on GarrantyDecrypt ransomware, it does not use typical encryption algorithm since it uses a random private RSA 348 key and then proceeds to use RSA 4096. It then adds the .garrantydecrypt suffix to each one of the encrypted files. Once the encryption is completed, it releases a file named “#RECOVERY_FILES#.txt” which contains the following ransom note:
“All your files have been ENCRYPTED
Do you really want to restore your files?
Write to our email –
[email protected]
and tell us your unique ID
[redacted 0x200 bytes in base64]”
Do not, under any circumstance, contact the crooks behind GarrantyDecrypt ransomware, nor should you pay the ransom it may demand. In fact, it’s best if you cease any contact with these attackers and focus instead on restoring your encrypted files.
How does GarrantyDecrypt ransomware proliferate?
GarrantyDecrypt ransomware may proliferate using unprotected RDP configuration, exploit kits and malicious spam email campaign which is why you must always keep your computer protected by constantly updating the system and all the antivirus and security programs installed in it.
Follow the removal instructions laid out below to successfully eliminate GarrantyDecrypt ransomware from the infected PC.
Step 1: Tap the Ctrl + Alt + Delete keys to open a menu and then expand the Shut down option which is right next to the power button.
Step 2: After that, tap and hold the Shift key and then click on Restart.
Step 3: And in the Troubleshoot menu that opens, click on the Advanced options and then go to the Startup settings.
Step 4: Click on Restart and tap F4 to select Safe Mode or tap F5 to select Safe Mode with Networking.
Step 5: After your PC has successfully rebooted, tap Ctrl + Shift + Esc to open the Task Manager.

Step 6: Go to the Processes tab and look for any suspicious-looking processes that could be related to GarrantyDecrypt ransomware and then end their processes.

Step 7: Exit the Task Manager and open Programs and Features in Control Panel by pressing the Windows key + R, then type in appwiz.cpl and then click OK or press Enter.
Step 8: Look for suspicious programs that could be related to GarrantyDecrypt ransomware and then uninstall them.

Step 9: Close Control Panel and tap Win + E keys to open File Explorer.
Step 10: Navigate to the following locations and look for the malicious components created by GarrantyDecrypt ransomware like [random].exe, #RECOVERY_FILES#.txt and make sure to delete them all.
- %APPDATA%
- %TEMP%
- %APPDATA%\Microsoft\Windows\Start Menu\Programs\Startup\
- %USERPROFILE%\Downloads
- %USERPROFILE%\Desktop
Step 11: Close the File Explorer.
Before you proceed to the next steps below, make sure that you are tech savvy enough to the point where you know exactly how to use and navigate your computer’s Registry. Keep in mind that any changes you make will highly impact your computer. To save you the trouble and time, you can just use [product-name] this system tool is proven to be safe and excellent enough that hackers won’t be able to hack into it. But if you can manage Windows Registry well, then by all means go on to the next steps.
Step 12: Tap Win + R to open Run and then type in regedit in the field and tap enter to pull up Windows Registry.

Step 13: Navigate to the listed paths below and look for the registry keys and sub-keys created by GarrantyDecrypt ransomware.
- HKEY_CURRENT_USER\Control Panel\Desktop\
- HKEY_USERS\.DEFAULT\Control Panel\Desktop\
- HKEY_LOCAL_MACHINE\Software\Microsoft\Windows\CurrentVersion\Run
- HKEY_CURRENT_USER\Software\Microsoft\Windows\CurrentVersion\Run
- HKEY_LOCAL_MACHINE\Software\Microsoft\Windows\CurrentVersion\RunOnce
- HKEY_CURRENT_USER\Software\Microsoft\Windows\CurrentVersion\RunOnce
Step 14: Delete the registry keys and sub-keys created by GarrantyDecrypt ransomware.
Step 15: Close the Registry Editor and empty the contents of the Recycle Bin.
To ensure the removal of GarrantyDecrypt ransomware from your system including the malicious components it has created on your system, follow the advanced steps below.
Perform a full system scan using [product-code]. To do so, follow these steps:
- Turn on your computer. If it’s already on, you have to reboot it.
- After that, the BIOS screen will be displayed, but if Windows pops up instead, reboot your computer and try again. Once you’re on the BIOS screen, repeat pressing F8, by doing so the Advanced Option shows up.

- To navigate the Advanced Option use the arrow keys and select Safe Mode with Networking then hit
- Windows will now load the Safe Mode with Networking.
- Press and hold both R key and Windows key.

- If done correctly, the Windows Run Box will show up.
- Type in the URL address, [product-url] in the Run dialog box and then tap Enter or click OK.
- After that, it will download the program. Wait for the download to finish and then open the launcher to install the program.
- Once the installation process is completed, run [product-code] to perform a full system scan.

- After the scan is completed click the “Fix, Clean & Optimize Now” button.